When we spent a year slow traveling in Europe, all of our destinations were planned around the photography we wanted to do. A lot of the time this meant quiet old towns or natural splendor, but in Rome we wanted to try to capture stand-out images of some of the most photographed places on Earth. Our primary focus was on the Roman Colosseum, and we put a lot of time into finding the best angle and planning the best execution of our shot. Here’s how we got our best photo.
By the way, this article contains affiliate links. If you click on one and make a purchase, we will earn a small commission at no extra cost to you. These commissions help support our travels and this website. To learn about how we are monetizing this travel blog, read our monthly report, Operation Digital Nomad.
Challenges of Photographing the Roman Colosseum
The Colosseum is cool looking, which means that it makes a great subject for photography, but it also comes with a few challenges. Here are some of the obstacles we encountered when we wanted to get a good image.
The Roman Colosseum is Crowded
Rome is notoriously crowded, and the colosseum is its top attraction. The huge arena gets over 4 million visitors a year, and you will be one of them. We wanted a photo that wasn’t mobbed with tourists, especially because we like to take photos with Dannie and Lisa immersed in the scenery, rather than propped against it. This meant we were going to have to find a way to get in there and take a picture either before the tourists arrived or after they left. Maybe this is possible with the right permit, but something told us that our budget was going to require a different solution.
The other problem with crowds is that they limit your options. Attractions that bring in a lot of people usually ban the use of tripods and other bulky gear that could obstruct paths or create a hazard, this means hand held cameras and ambient light only.
Visiting the Roman Colosseum is Expensive
Most people only make a single visit to the Colosseum on their trip, so they don’t mind shelling out a few bucks. They see it as a once in a lifetime experience. But when you are serious about taking photos, there is often an incentive to make multiple visits. First of all, we like to scout our photography locations. Secondly, sometimes things don’t go right on your first attempt and you need to try again. If the location has an entry fee, that can add up.
The price of a ticket to the colosseum - as of August, 2018 - is 12 Euros ($13.88). It’s affordable compared to the total price of a trip to Rome, but we didn’t want to pay it too many times. For up to date pricing, and to purchase tickets online, go to the official Rome tourism site (don’t buy the tickets anywhere else because you might get scammed).
Make sure you buy your tickets online, and get them printed out ahead of time, either at your hotel or a local print shop. Our Airbnb host actually had an office in the basement where she helpfully printed our tickets. Buying tickets online is actually a little more expensive, which seems counter-intuitive, but it doesn’t matter. Waiting in that ticket line will waste a lot of time and kill your chances of getting a shot without crowds.
The Roman Colosseum is Big
We wanted a photo of Dannie and Lisa looking dramatic (but not cheesy), by themselves in the colosseum. This makes the composition difficult. The colosseum is huge, but the spaces for walking where the views are good are quite small. That meant that any location where we had a good vista would require Dannie and Lisa to be elsewhere so that they wouldn’t completely obstruct the background we were looking for. We would have to split up and operate on our own.
How We Took Our Best Photo of the Roman Colosseum
Before we get started here, I just want to point out that one of the most important aspects of getting a great photo won’t be discussed in this article. That aspect is the ability to control your camera. If you are still leaving your photos up to luck by using your camera’s automatic mode, you should really have a look at my e-book, Easy Manual Mode Photography, so you’ll be able to get the most out of every shoot.
Planning Our Trip to Rome, Italy
We seriously planned our month in Rome around photographing the colosseum. Obviously we did other things while we were there, but we really wanted to make sure we did this one thing right. We find that we have better success with our photography when we have a single focus and a goal in mind. At other destinations we have shown up a bit more aimlessly, and our results reflected that.
Duration
Like most of the cities we visited in Europe, we gave the city a month. We knew that would be enough time to do a thorough job photographing the colosseum with enough time leftover to tour the rest of the city without making us feel rushed.
Location
To make things extra easy for ourselves, we booked an Airbnb right next to the Colosseum. Seriously, we were one block away. No matter where we went in the city, we had to walk by the colosseum, so we found plenty of great angles for photographing the landmark. Being nearby also gave us ample opportunity to monitor the conditions near the Colosseum, including the days and times when the lines were the longest, and which direction the sun came from in the morning and evening.
You can find our review of our Airbnb on our list of Every Airbnb We’ve Ever Stayed At, and if you’d still like to look around you might want to read our Airbnb Tips for Slow Travel.
Searching for the Best View of the Roman Colosseum
Knowledge is power, so to get our best photo of the colosseum we knew we would need as much information as we could get before we showed up with our camera.
Online Research
One of the first things we usually do when we are scouting a location is check out what other photographers have done. Our goal isn’t to copy them, but to understand what is possible in a given location. By now, we have gotten pretty good at figuring out how photos were taken, including what type of lens was used, where photographers were standing, and what kind of lighting they were using, if any. We also research the photography policies of a landmark, and even read tourist reviews for hints about avoiding crowds.
Another strategy is to use satellite view on Google Maps to get a feel for the layout of a place (assuming it is outdoors), so that we can see which directions are likely to have good views or ideal lighting. This is surprisingly helpful sometimes, especially when you combine it with Street View. Both of the previous links will give you a good idea of the views you can expect in the Colosseum. Note that in some places, like Vienna, there is no street view available.
Our Scouting Trip
Our boots-on-the-ground scouting of the Colosseum started when we first arrived, and it included monitoring the site and asking questions of the employees who worked there.
For example, we found out what kind of things we were allowed to bring inside. The website says that “large backpacks” are not allowed, but we discovered that our camera bag was a permissible size. We also asked one of the guards what time we would need to show up if we wanted to be the first ones in line. The guard said that 7:30 AM should do the trick. That was one hour before the Colosseum opened at 8:00, and we decided to play it safe and show up at 7:00 on the day of the shoot.
We also bought an extra set of tickets and did a walk-through of the arena the week before. We explored it pretty thoroughly, and found an angle we liked. It was on the upper level (see the street view link a few paragraphs up), and there was a platform below where Dannie and Lisa could stand. We then went down to the platform and I posed Dannie and went up to grab a quick photo, even though the light was bad and the shot was full of tourists. This way we could make adjustments for the day of the shoot.
Both ends of the colosseum had platforms, and the one at the other end seems to be more popular for photos of the interior. We liked this one however because 1) it was smaller and would fill less of the frame with empty space and 2) in the early morning the sun would be coming in from the east on the opposite end. If we were on the side with the big platform, Dannie would be in deep shadow (as you can see if you examine the background of our final product), which would mean we would lose out on the sunlight shining through the fabric of her dress and the dramatic shadow she cast on the floor.
Establishing Our Roles
Since Dannie and I would be too far apart to communicate effectively during the photo shoot, we planned out what each of us would be doing when it was time to execute.
Posing for the Photo
Dannie would head straight to the platform. She would have to hurry, even though she was carrying a baby with her. Her Dress would be tucked into her belt so that she could walk more easily, and she wore a trench coat that would keep her warm but could be easily discarded when she arrived.
She had a long piece of red fabric tied around her waist, made of the same material as her dress that would add flare to the image. It was a similar look to the one we used on a mountain over the town of Kotor, Montenegro. Because of our scouting, she already knew exactly where to stand and where she would put her coat and the baby carrier she was using to carry Lisa around. (By the way, if you are touring the colosseum with a baby or toddler, we highly recommend a baby carrier, since the colosseum is not really stroller friendly - even if you have an awesome travel stroller like ours)
Capturing the Photo
My job was to be up on the higher level with my camera to take the photo. Because our widest lens was still not wide enough to take in the entire scene, the first thing I would do would be to capture a multiple image panorama with the good morning light. Then, I would wave to Dannie so that she could start posing.
Like Dannie, I memorized my route so that I could get there as quickly as possible and start shooting before the tourists caught up with us.
(Finally) Taking Our Best Photo of the Roman Colosseum
Getting Up Early
On a morning with good weather predicted, we got up nice and early so that we would have time to eat a little bit, and get our gear and clothing in order. Dannie didn’t have to spend long on hair and makeup since she would be too small in the photo for that to make much of a difference. That’s why we had chosen such a brightly colored dress.
We got there an hour and a half before the colosseum opened and it was good thing we did; only five minutes after we arrived, a line started forming behind us. But we were first. While we waited, we did our best to keep Lisa entertained, letting her waddle around next to us, singing songs with her, and feeding her treats that would buy us time. The last thing we wanted was for her to be in the throws of a tantrum when it was time to enter the colosseum or pose for the photos.
When the gate was about to open we strapped Lisa onto Dannie’s chest (using our Ergobaby Omni 360 - read our in depth review) and steeled ourselves. We went through security, which included opening our camera bag so the contents could be examined. That’s why we made sure not to pack any extra gear that we wouldn’t use but which might slow us down. There were multiple security gates, so we knew that any delay might allow someone to pass us.
We then split up and went our separate locations.
Executing the Shot
When I got up to the predetermined location, I already had my camera out because I never put it back in my bag after going through security. I had taken a couple shots outside so that the exposure settings were already correct and wouldn’t need to be fiddled with.
The first thing I did was take my panorama. I took a quick photo of Dannie’s position with the camera set to autofocus so that the right location would be in focus. Then I switched to manual focus (so that the focal point wouldn’t shift), turned my camera sideways and panned across the scene taking photos. I did two sweeps like this - one high to capture the upper levels of the colosseum, and one low to get the bottom. Later, Dannie would stitch the images together into one big photo.
Then I signaled to Dannie to start posing. She held Lisa high, untied her dress, and tossed the fabric around her waist into the air repeatedly. I took rapid fire shots so that we would have plenty to choose from. I didn’t bother switching back to automatic focus since she was in the same position I had already set.
Mistakes We Made
The biggest mistake was leaving too large of a gap between our scouting trip and our colosseum photo shoot. By the time we got there for our shoot, an exhibition in one of the hallways had changed, and when I got the second level it was blocking my door to the exterior. I had a really hard time finding my way out to the platform, and the delay this created was enough time for some of the tourists to catch up with Dannie.
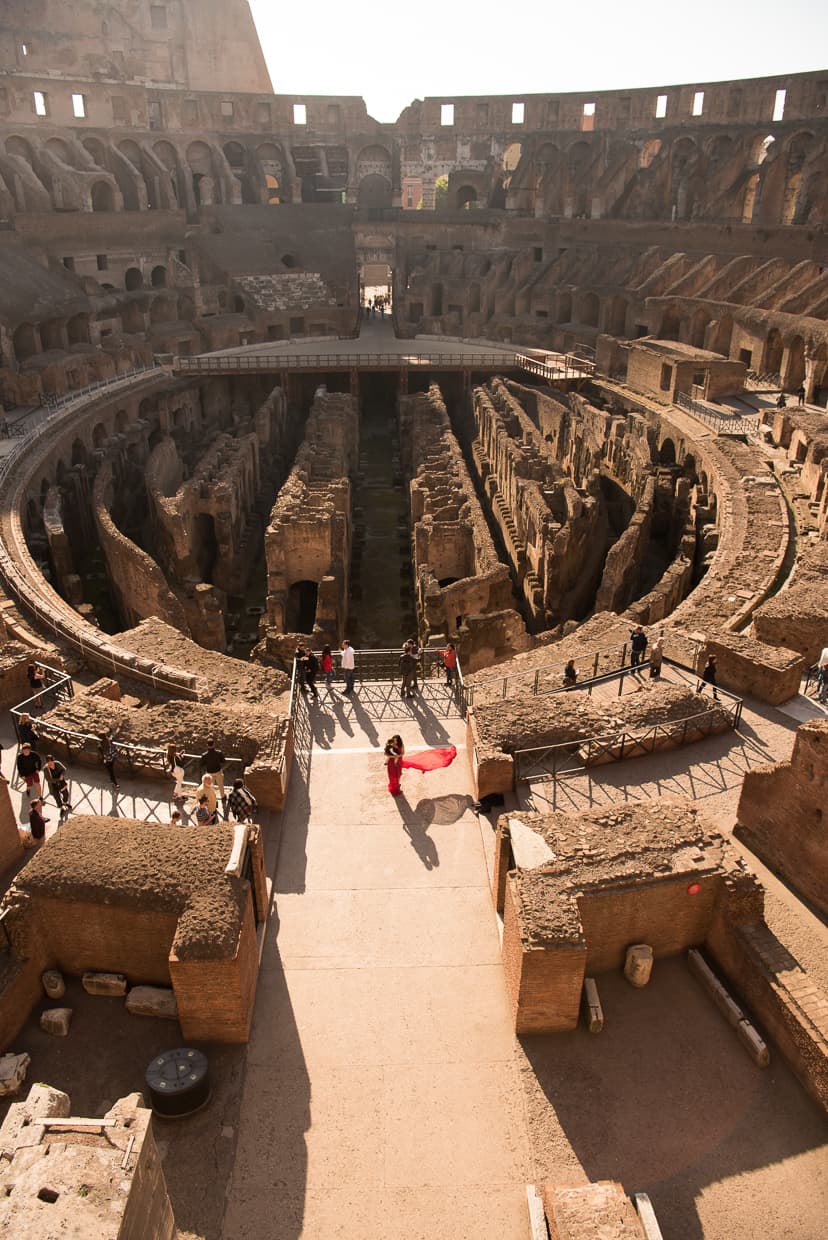
As a result there were a few tourists in our shot that Dannie was going to have to edit out. It wasn’t a disaster, though since they were still sparse enough that she could piece the scene together from the multiple images we had taken.
Editing Our Photo
Dannie does all of the photo editing for our images, and she does it using Lightroom and Photoshop, both of which come in the Adobe Creative Cloud Suite (a bargain for serious photographers at $9.99 a month).
Stitching the Images Together
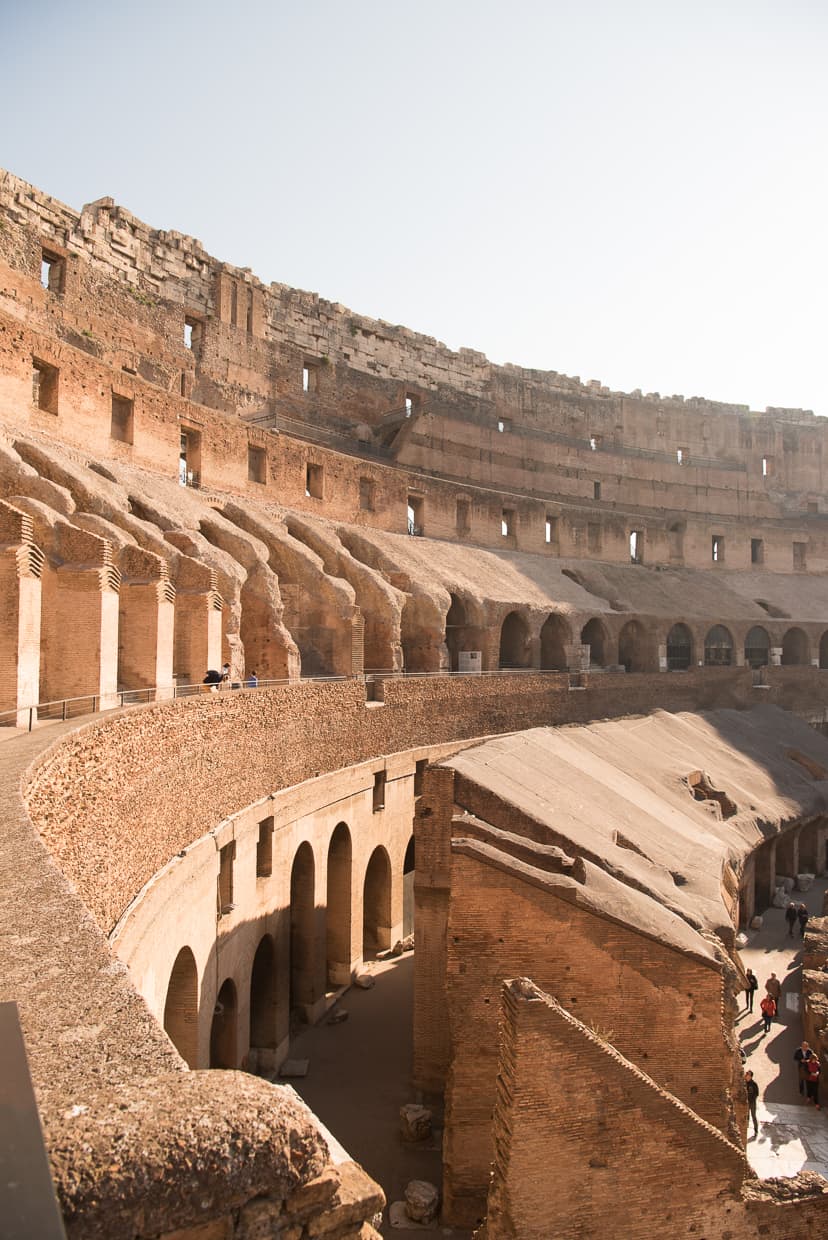
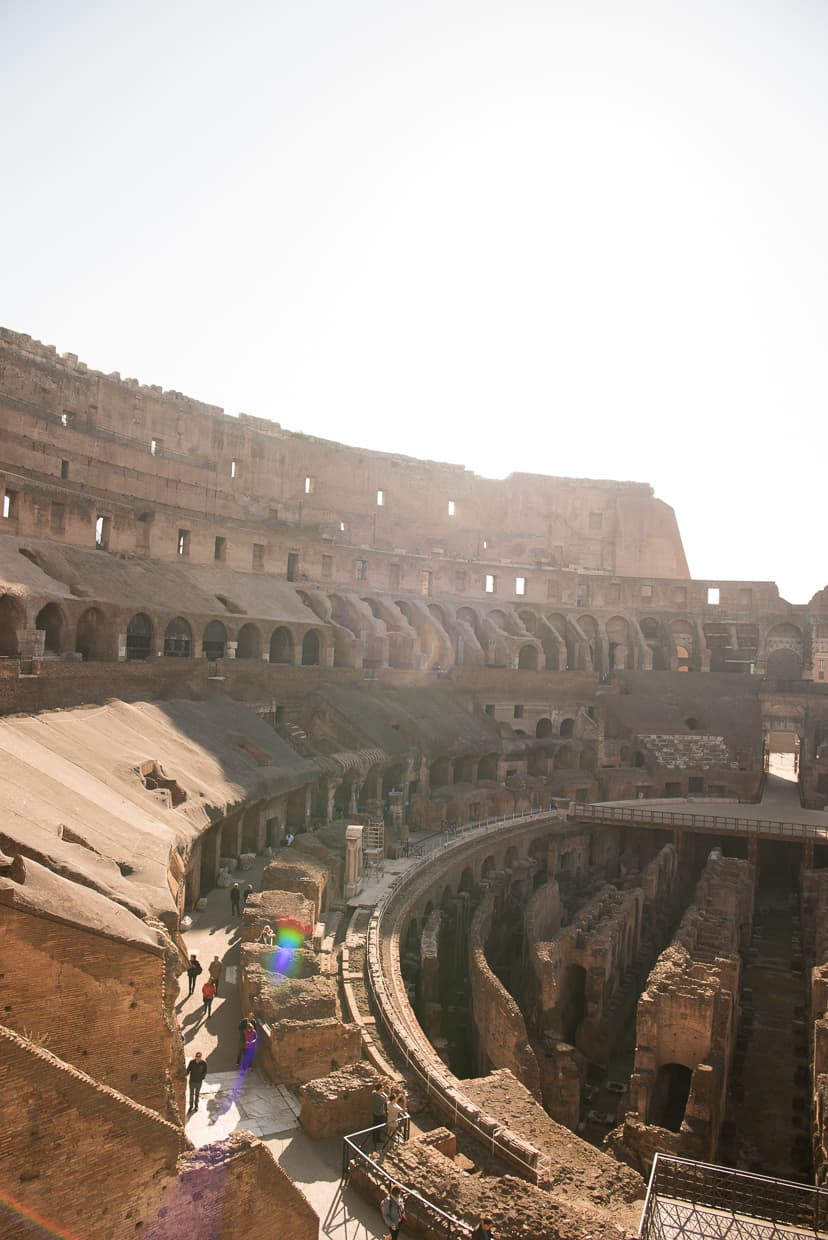
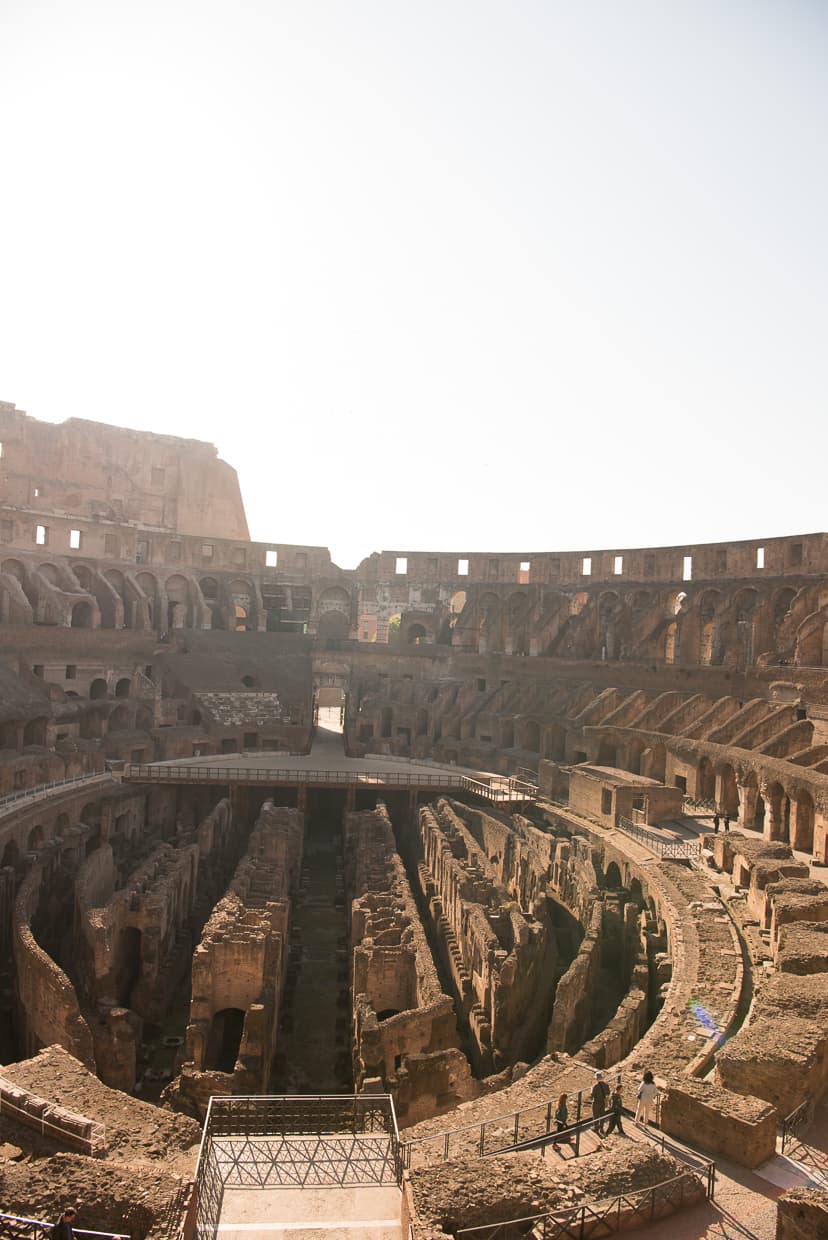
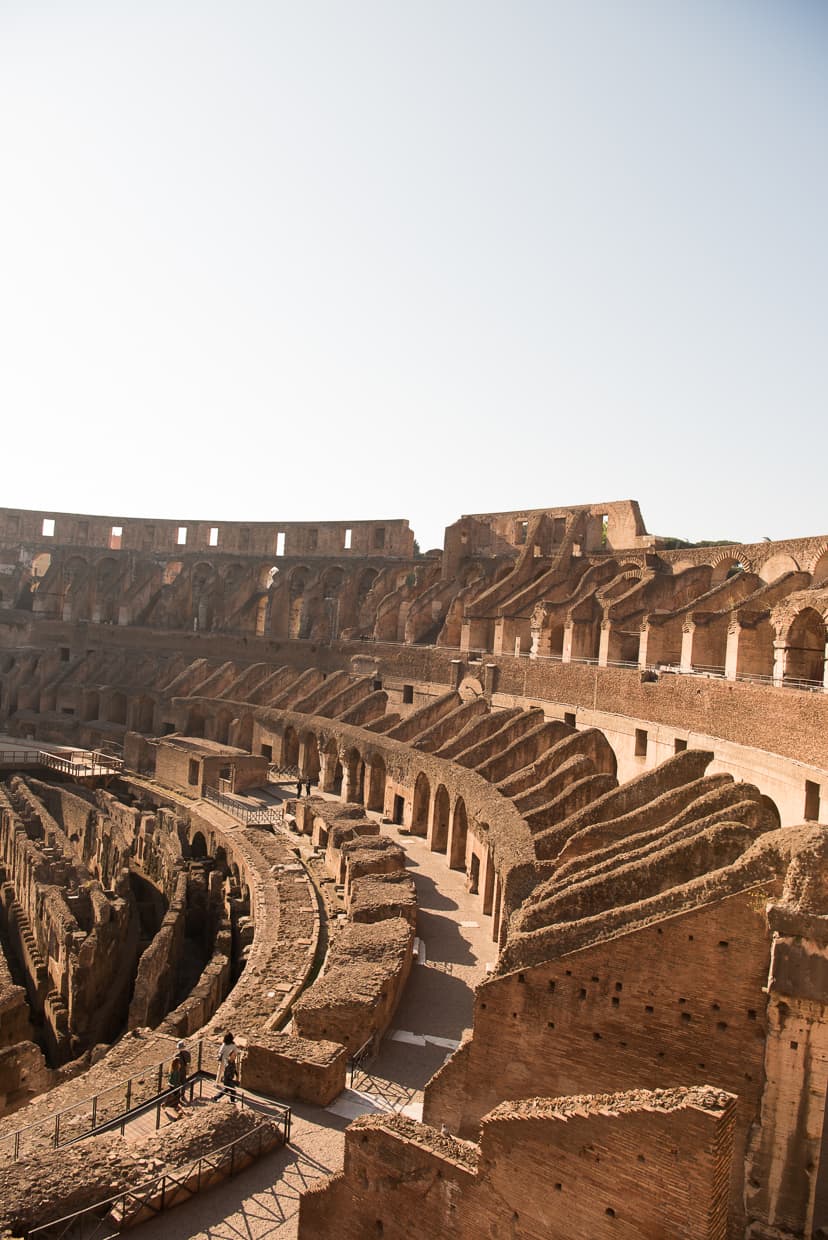
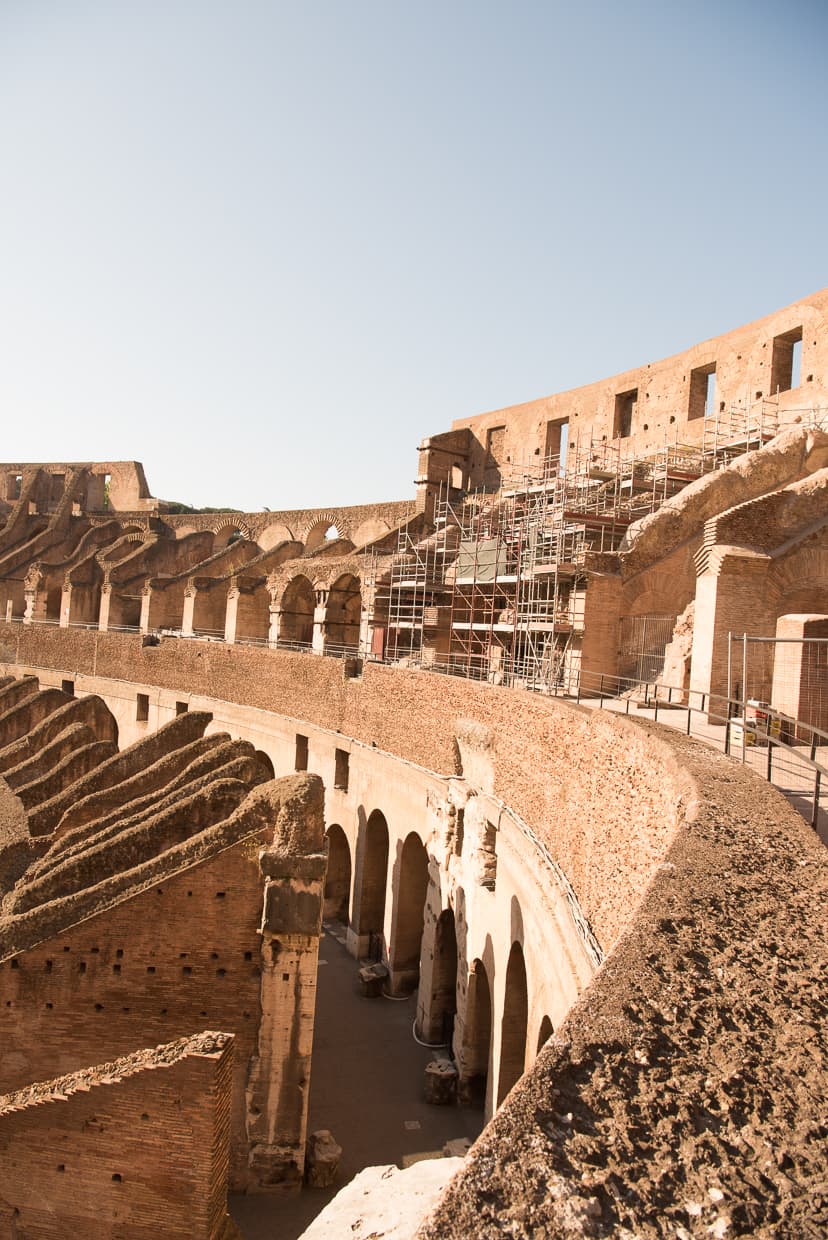
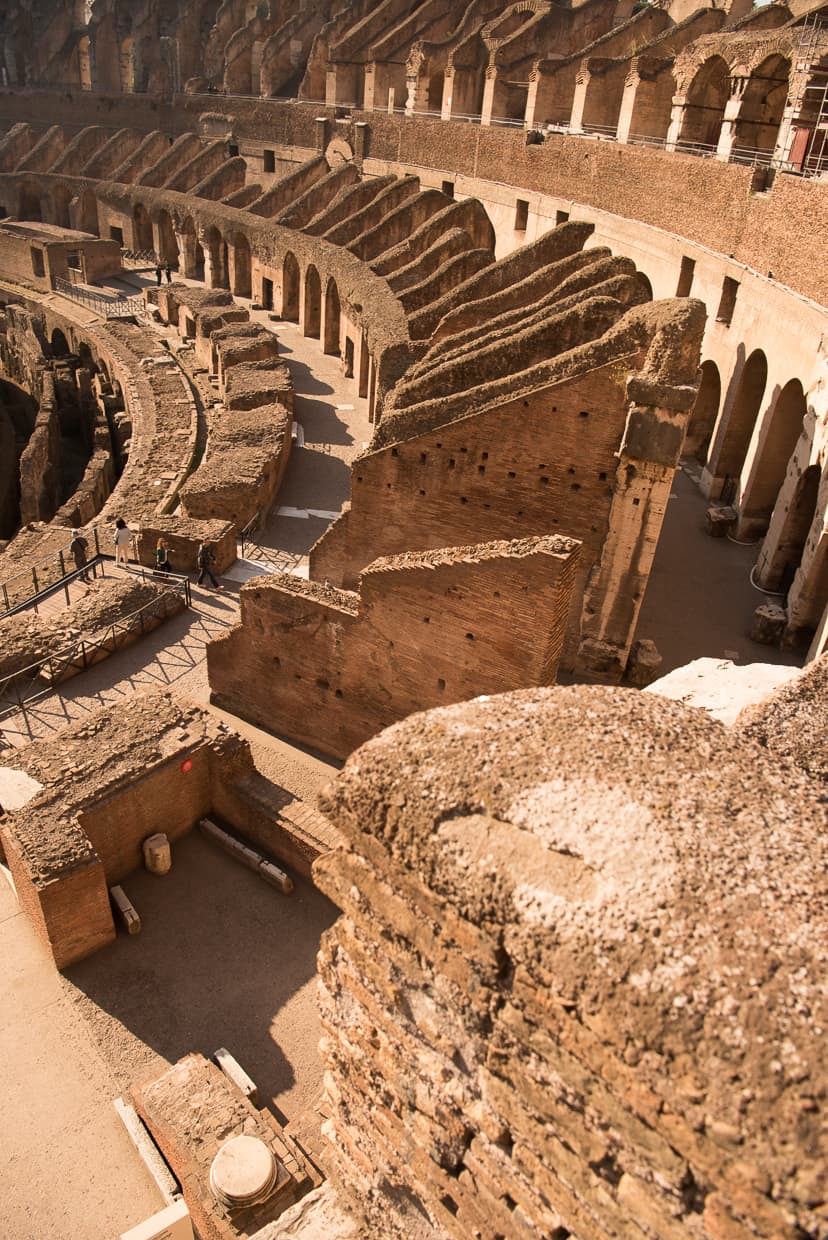
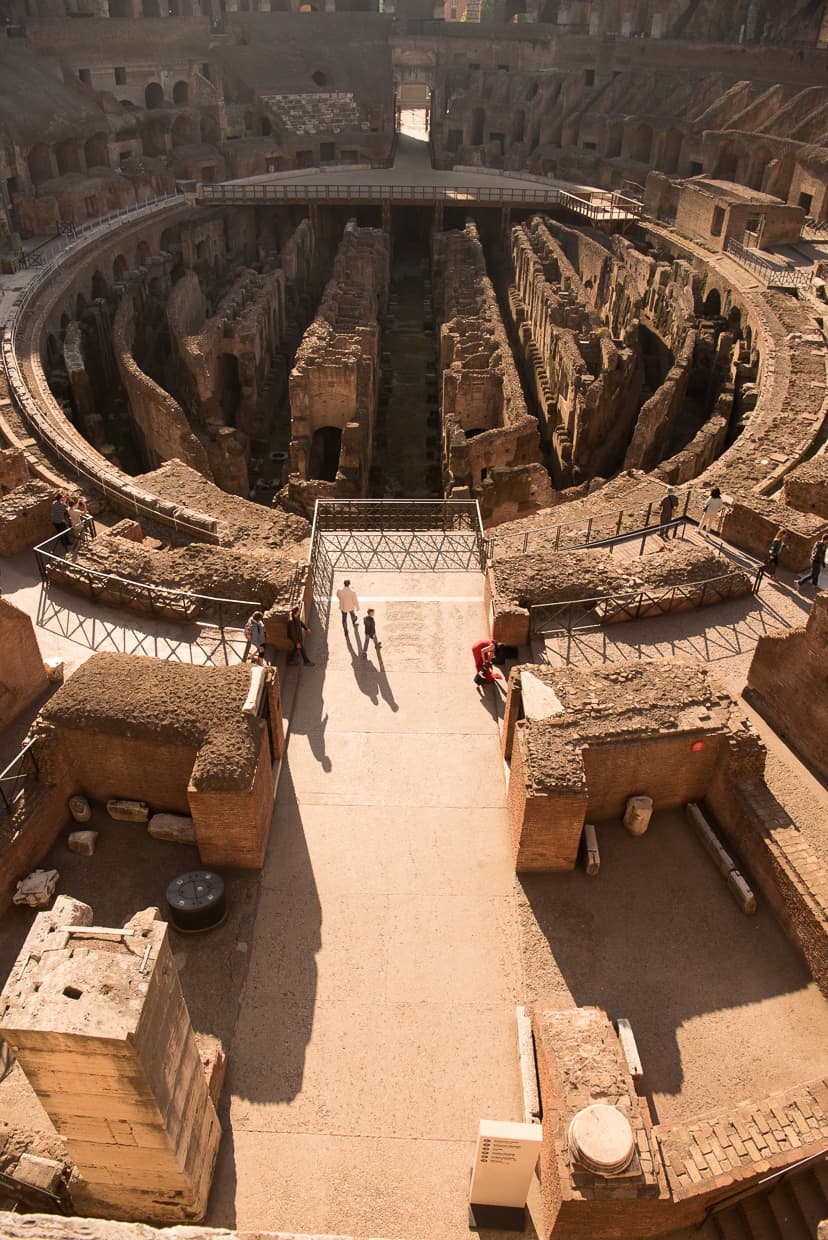
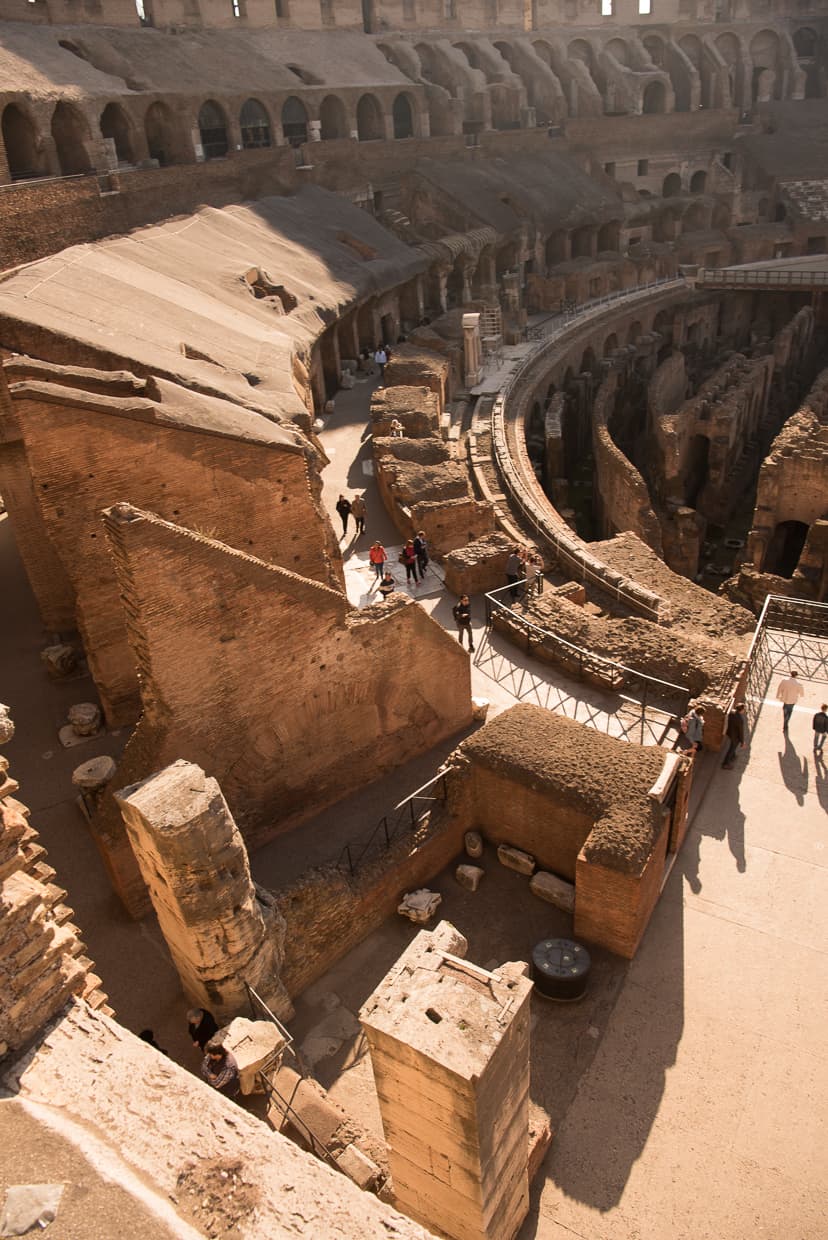
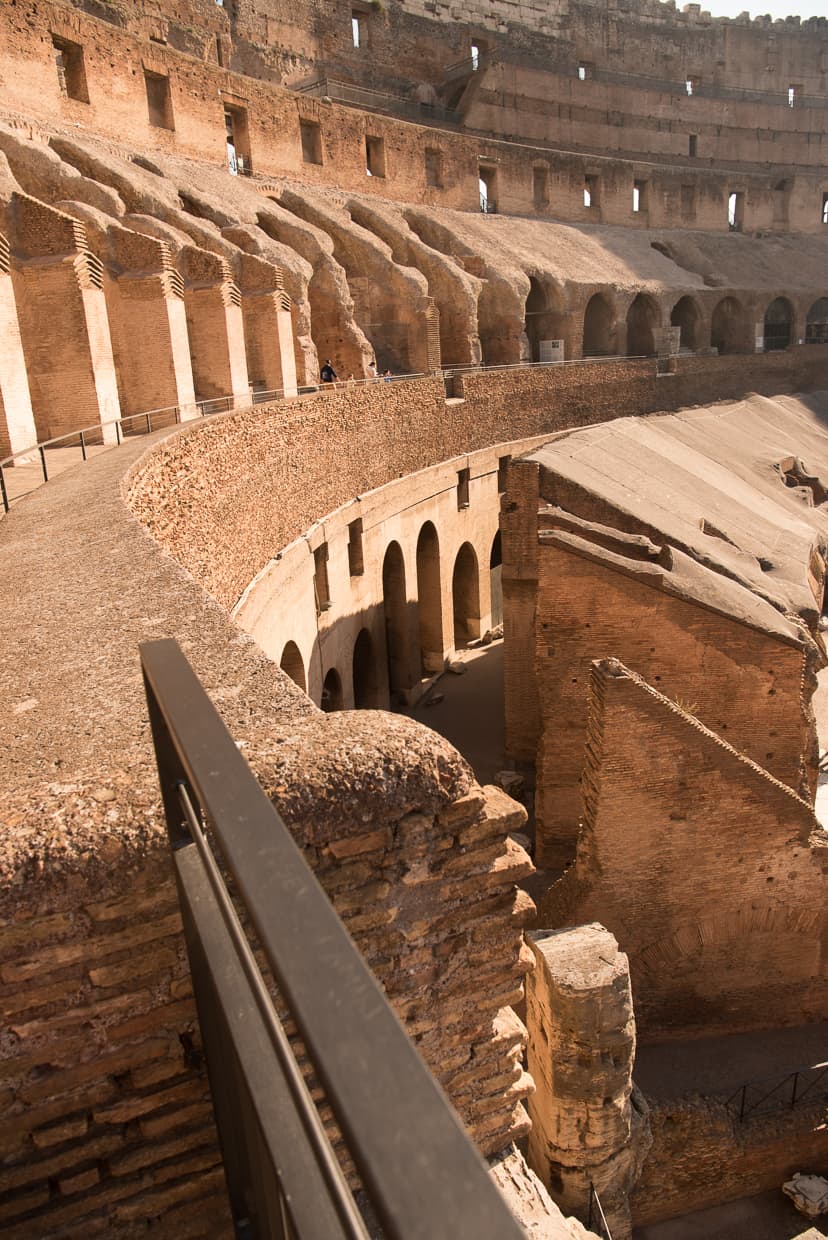
Lightroom and Photoshop are both capable of stitching images together, but Dannie used Lightroom for this one. Here are the photos I took before they were stitched together:
As you can see, I used vertical images. That was because the hardest part of doing a stitched panorama is making sure that keep your camera at the same angle as you sweep from one side to the other. I figured I’d be less likely to make a mistake if I did two sweeps with more photos than three sweeps with fewer to cover the same area in horizontal frames.
After Dannie stitched the images together, it looked like this:

Finally, it was time for Dannie and Lisa to be added to the image. Here is what they looked like in the photo we finally selected. Because I kept all of my settings on the camera the same - which is much easier to do when you shoot in manual mode - and never refocused the lens, Dannie didn’t have to do any more work than necessary when adding her image layer in, lining it up correctly, and brushing herself in using a layer mask.
Filling the Sky
After Dannie spent some time removing the few tourist that made their way into the photo, it was time to fix the sky a little bit. The sun was casting great shadows through the colosseum, but the sky that day was actually very boring to look at compared to the amazing landmark in front of us. Whenever I see a beautiful sky, I try to take a picture of it so that Dannie can use it later. Sometimes we’ll have a photo where the sky is overexposed, losing details. Sometimes it’s cloudy, and sometimes we just want a little something extra.
If you don’t have your own collection of sky photos to add to your images, you can always buy some on a site like CreativeMarket (search for “sky overlays”).
Before she could add the sky layer and mask out the old sky, Dannie first had to shrink the colosseum image. It was currently the size of several images stitched together, and the sky was just the size of one image. If she enlarged the sky to fit, it would have looked very pixelated.
Conclusion
Here’s the final product:
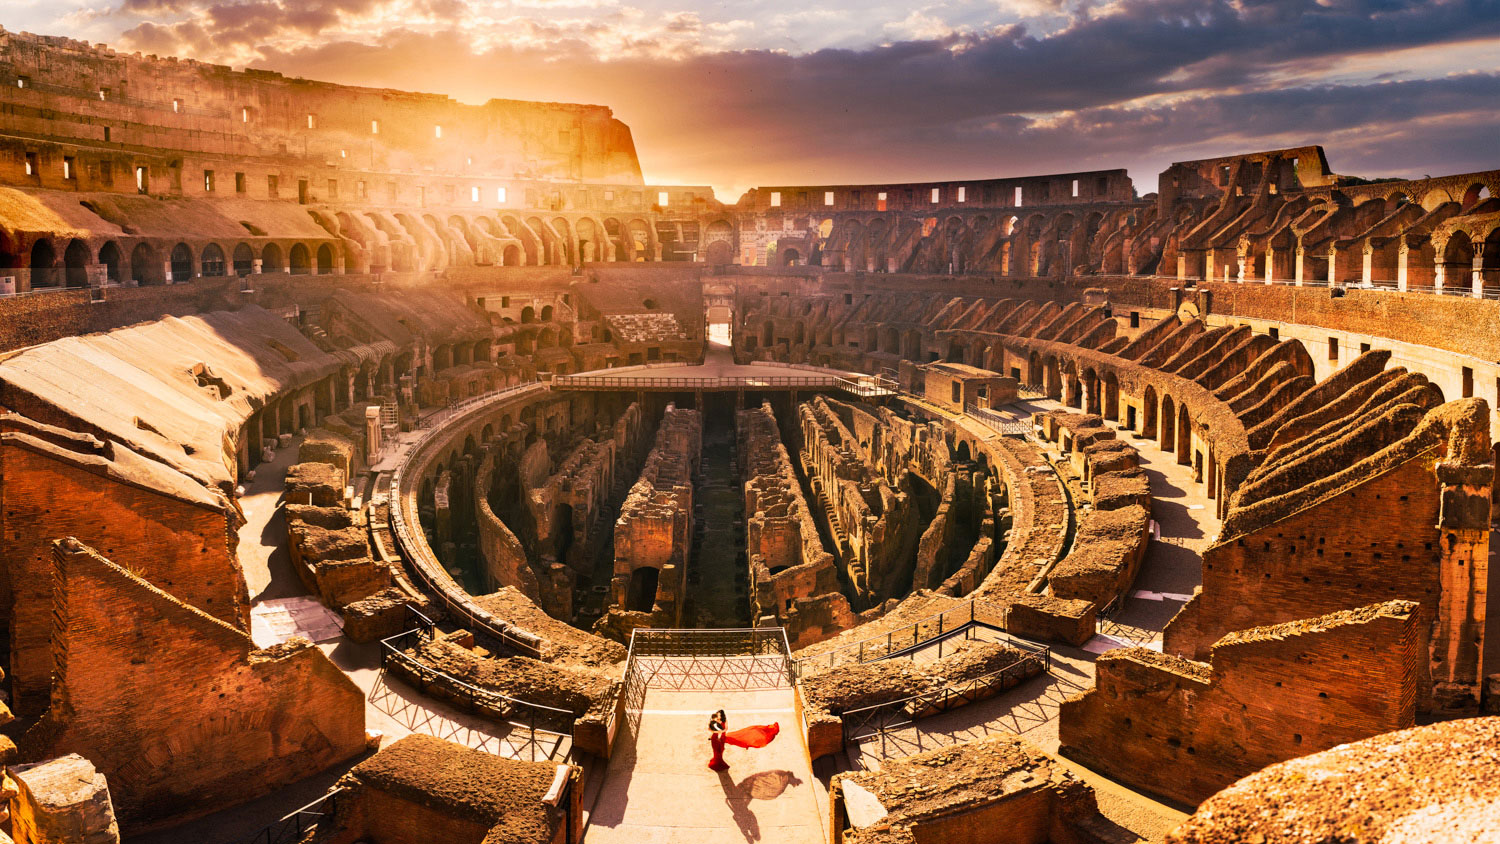
Our Colosseum photo was one of our favorite photos from Rome, Italy, or Europe in general. We put a lot of work into it, we had a lot of fun taking it, and it’s very rewarding to look at. Photos don’t always come out the way you plan them (and sometimes that’s a good thing), but when they do it makes you feel warm and cozy.
Incidentally, the camera we used was our Nikon D810, and the lens was our trusty 24-70mm. But realistically, since the image you are creating with a multiple image stitch is so large, you could easily get away with almost any DSLR as long as you read the reviews and learn how to use it. (And don’t forget to learn how to use that stuff properly by mastering your camera).
Hopefully you found this article useful. If you did, you can find many other photography tips and guides from all over Europe and Asia on our destinations page. And if you’d like to support our travels and articles like this one, consider heading over to our shop or resources page the next time you are planning a big adventure or looking for new gear. Happy travels!
Leave a Reply